Gray✦Mane’s HDSkins Guide
Comprehension Compendium
For Creatures similar in shape and size to Ponies
(An Intermediate-To-Advanced Guide)
I’m Gray Mane , and I’ve been making pony skins since probably mid-late 2013.
This is a collection of the styles, processes, and techniques I’ve compiled since then.
Even if you're already experienced with HDSkins, I hope you can get something out of my guide.
CONTENTS
1. What You Want, What You Need
2. Skin Setup and Format
3. The Pixel's Purpose
4. Outlines and You
5. Round Eyes, Square Heads
6. A Cut Above The Rest
7. Bits and Bobs
8. Measure Twice, Cut Once
What You Want, What You Need
The easiest way to achieve a crisp, high-resolution skin is with the help of a few specifc tools.
Recommended Items
●
2+ Hours (Arguably in multiple sittings.)
These are your bread and butter. Without them, your skin is quite likely to go awry.
Skinning becomes its most time consuming when you don’t know the whys or hows.
(Being able to draw ponies properly is also a great asset, but you can make whatever you like.)
Don’t expect immediate results if you don’t already know your way around a regular MineLP skin.
(I also suggest keeping Minecraft open and/or using SkinEx for testing.)
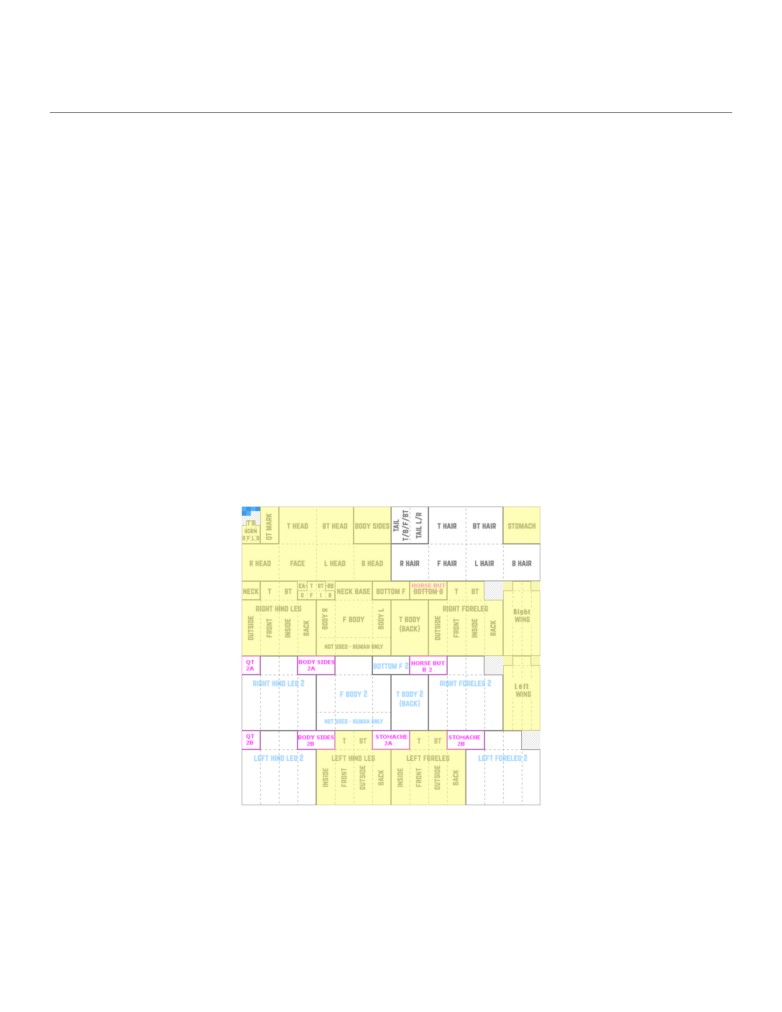
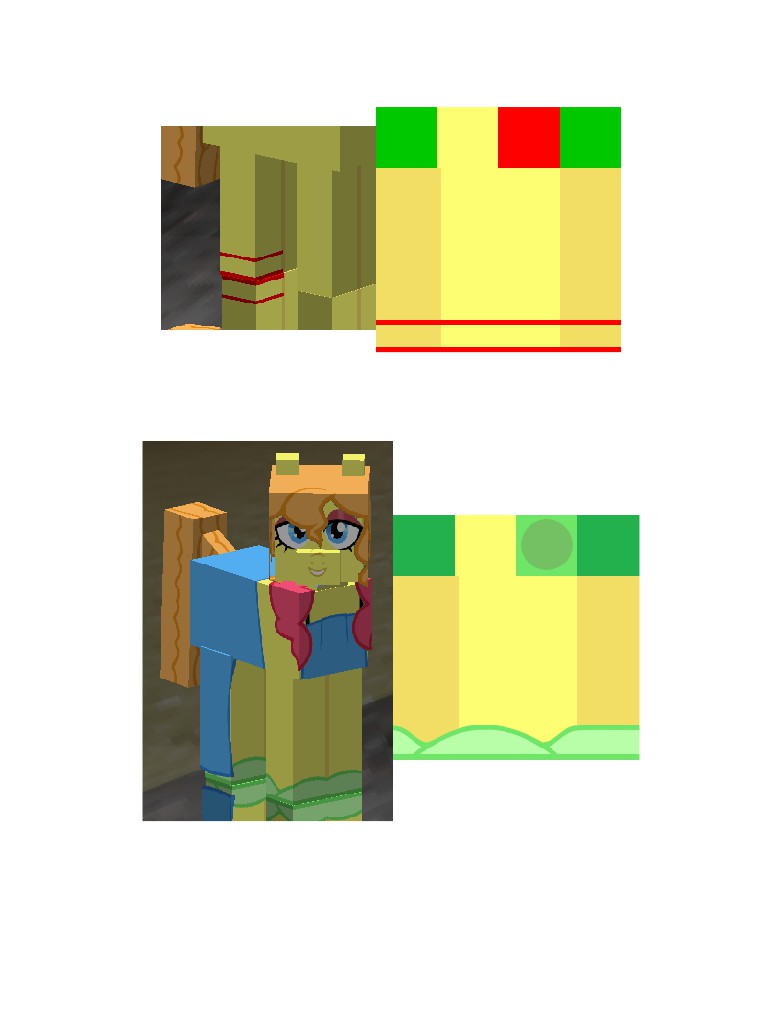
Skin Setup and Format
Now that you've assembled a team of image processing programs, it's time for technical details.
If your skin isn't a .PNG image in one of these resolutions, the HDSkins mod won't load it.
In addition to the traditional sizes;
64x32,512x256, and 1024x512
(can cause issues such as missing legs and wings)
are the more recent complex sizes;
64x64, 512x512,and 1024x1024
If you wish to convert your skin from traditional size to complex, there is an official tool.
For the sample skin, I’ll be doing the absolute largest size, 1024x1024.
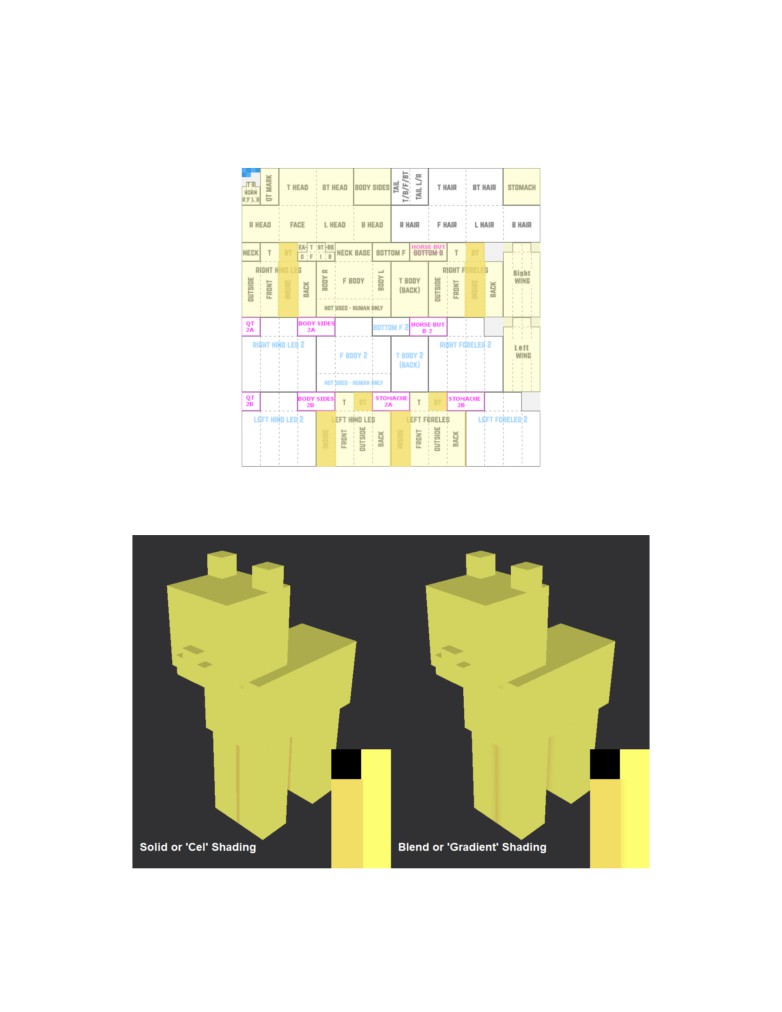
To start, load the Skin Template into an image editor of your choice and create a new layer.
Fill in the main body of the skin, taking care not to color outside the lines.
Following this, open another new layer and fll the insides of the legs with a darker color.
I suggest more saturated colors (as opposed to a pure black.) These are mostly for depth.
Should you decide these shadows are too plain, consider that soft edges may become a hassle.
Just something to be aware of, you'll want to shade any clothing you make like this too.
Not all parts of the skin are easy to see, but there are some functions in the Skin Manager that help.
The swimming pose, for example, is useful for viewing the skin's undercarriage.
While the inclusion of SkinEx has made detail work easier than ever,
The Pixel's Purpose
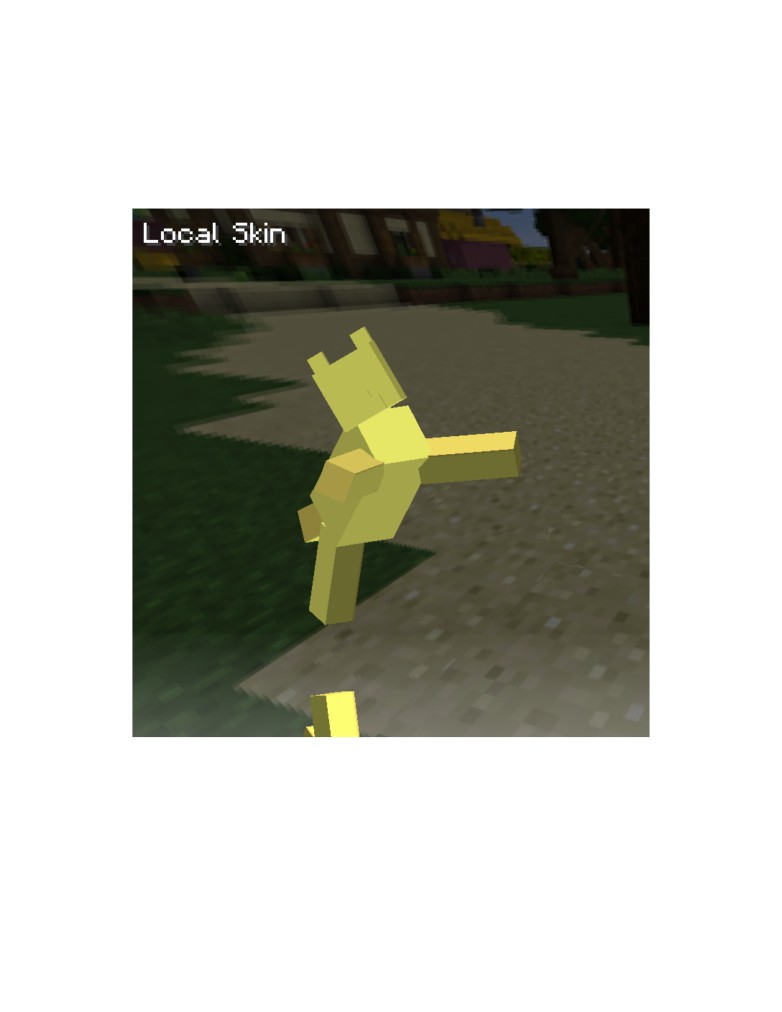
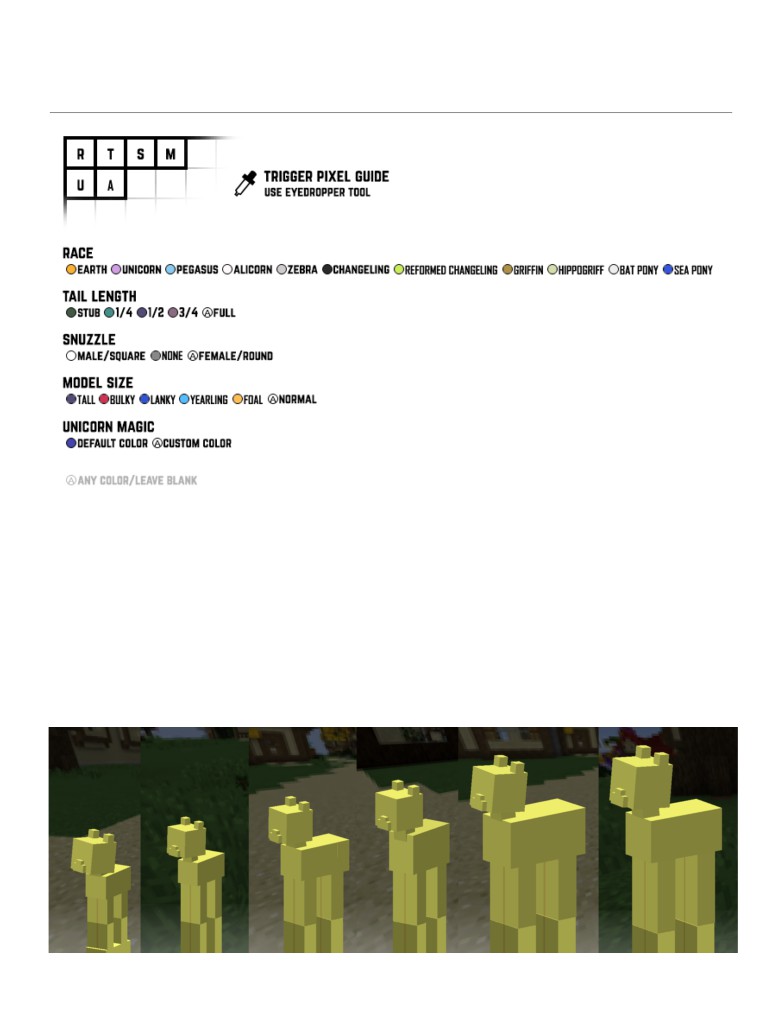
In a mere 4x1 space at the top of your skin lies a crucial detail, your Trigger Pixels .
These few pixels are what tell the MineLittlePony Mod what shape your skin should take.
(Just as a note, the ofcial Guide is inaccurate. The Stub Tail Trigger is #d19fe4 and Kirin is #fa88af.)
As the ofcial guide suggests, there's a fairly signifcant variety of races to choose from.
For the most part, the races are unique, but there are a few clones (Kirin, Grifon, and Hippogrif)
that are meant for compatibility with another mod, Unicopia , by the MineLittlePony developers.
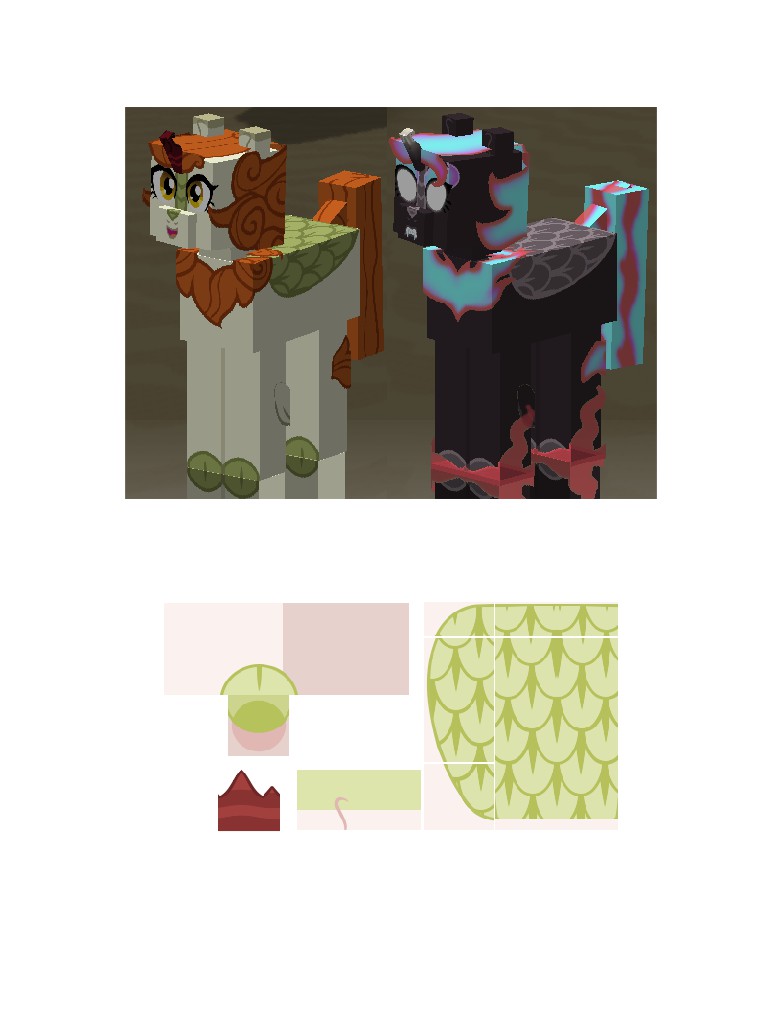
Alicorn, Zebra, Changeling, Reformed Changeling, Batpony, and Seapony all have unique features.
(Horn & wings, neck & mohawk, horn & bug wings, long ears & bat wings, and horn, fns, & fsh tail.)
Additionally, there are the Tail, Snout, Body, Magic, and Accessory pixels.
These determine length of the tail, the shape of the snout, the size of the body, and magic color.
Magic, which is only used by horned races (includes Seapony) has an interesting quirk,
it grows more transparent the darker the color is, with black being totally transparent.
Finally, there's the Accessory pixel, otherwise known as Pony Gear , which I myself cannot explain.
Bag can be customized for wingless races.
Outlines and You
Although it's not necessary to the guide, I know some have found it helpful to know more about my
personal process. I don't make my skins free-hand.
Is it an afront to the integrity of art? Are pony skins art?
This is basically how it goes for me, yes.
My personal method is prefabrication. I make the individual parts of the skin one by one, run them
It gives me a lot of control over details. The show's art was made using a similar method.
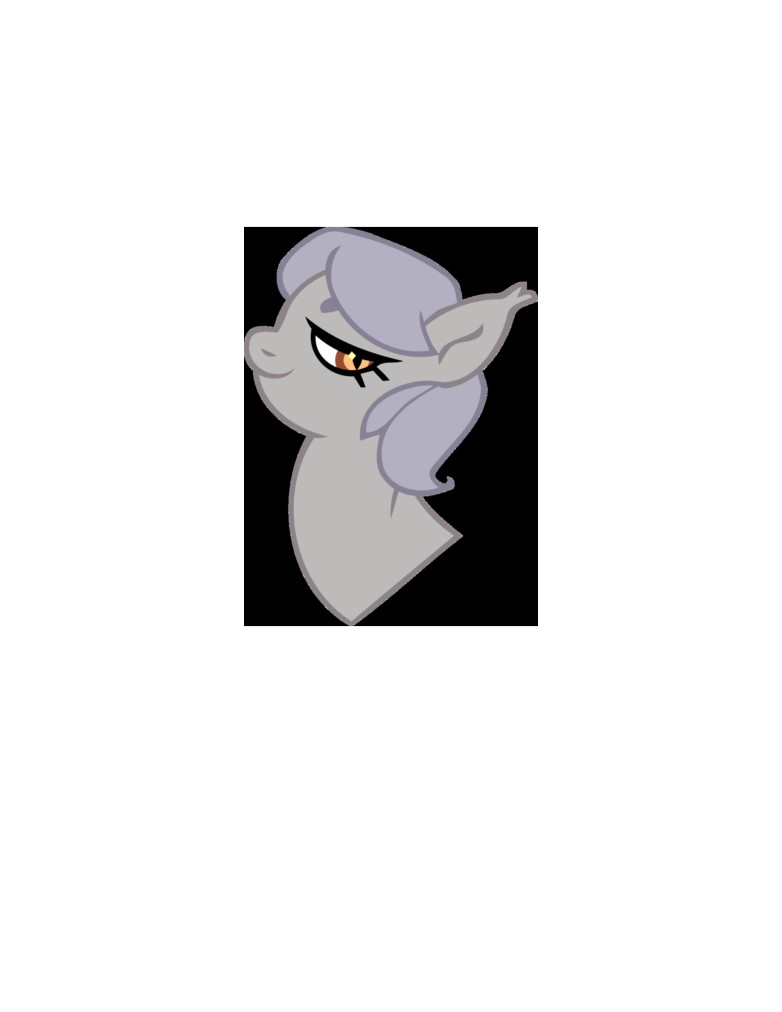
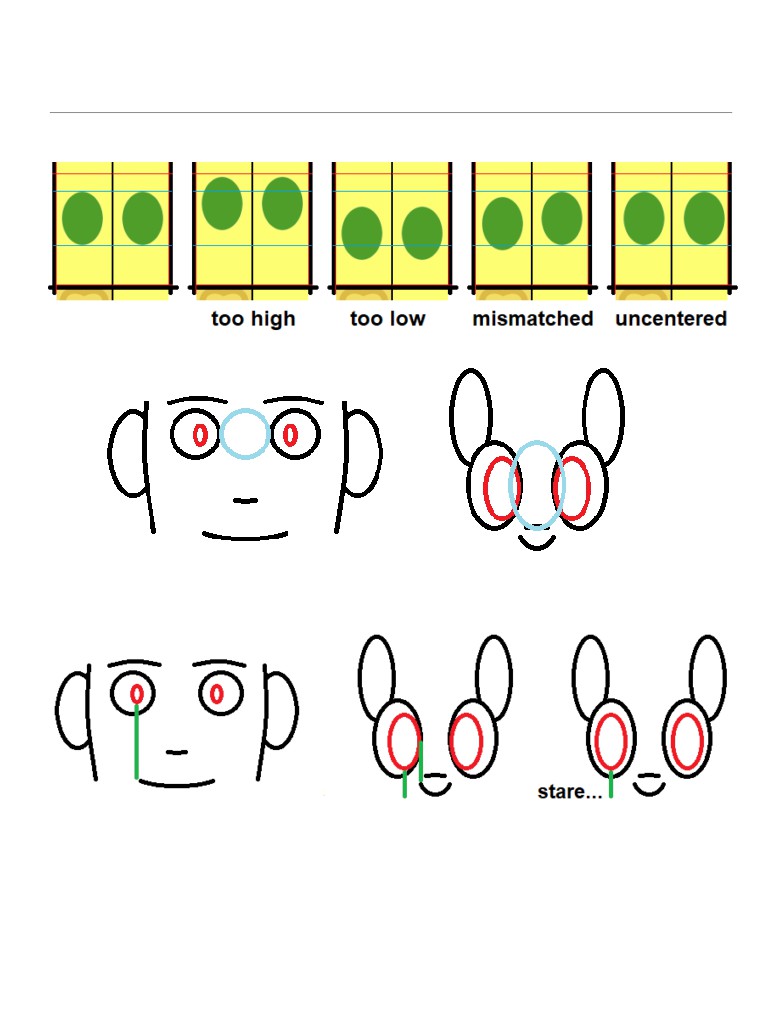
Round Eyes, Square Heads
I've seen a lot of ponies in my time. Their eyes are usually on their heads.
On the average person, eyes are about one eyeball apart from each other.
Ponies, as a prey species, have monocular vision. Their eyes are set a bit diferently from ours.
The centers of a person's eyes meet at the corners of the mouth. We haven't gotten that far yet,
but just from the example we can tell that this makes an odd looking pony.
The change here is that the edge of the pupil needs to meet the edge of the eye instead.
At one point, I thought my choices of eye strayed from the show's style signifcantly.
After proper research, I realized that even as early as S1 the faces were pretty widely varied.
All ponies have some form of outline around their eye, so don't think there’s any getting out of this
step. If you're using a vectoring program, I suggest processing the eyelashes separately.
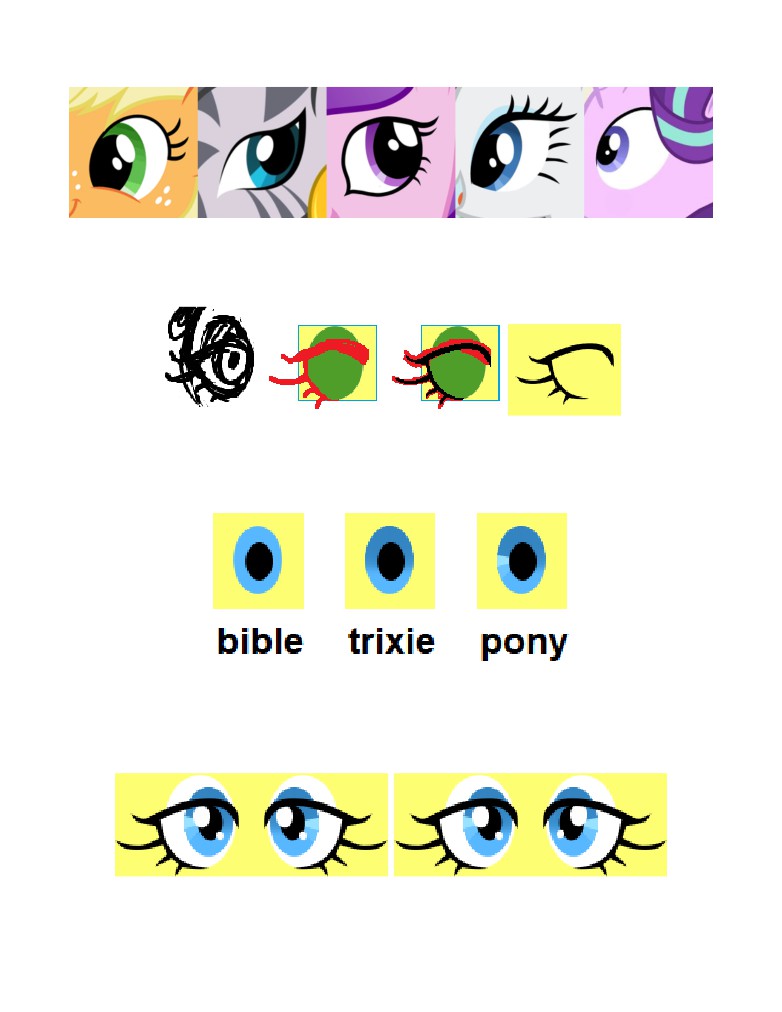
Even knowing the shape of the iris shine (it's a pie slice,) their placement eluded me for a long time.
Irises are about 75% of the eyeball and pupils are 65% of the iris, both depending on expression.
Mayor Mare, Trixie, and Grifons lack these highlights, so don't feel like you absolutely need them.
If you do choose to use highlights, there's a lot of fun stuf you can do with the colors.
Just to clarify, the one on the left has parallel shines.
Because the iris is concave, the light refected on its insides is mirrored.
There's still that membrane making the eye round though, so the shines are parallel.
In the case of HD skins, I generally recommend against the Female Snuzzle Trigger Pixel.
There's a place for them, but not here.
Using subtle curvature, a nose creates depth where there is otherwise none.
It sits at half its own length away from the eyes on either side and fush (horizontally adjacent) with
the bottom of the eye. Nostrils are parallel to the corners of the nose.
The mouth by itself isn't particularly difcult, it's more about capturing an expression.
Something to watch out for is the line weight. As an example, an open smile.
Thick lines generally should taper towards the end, instead of suddenly ceasing.
A Cut Above The Rest
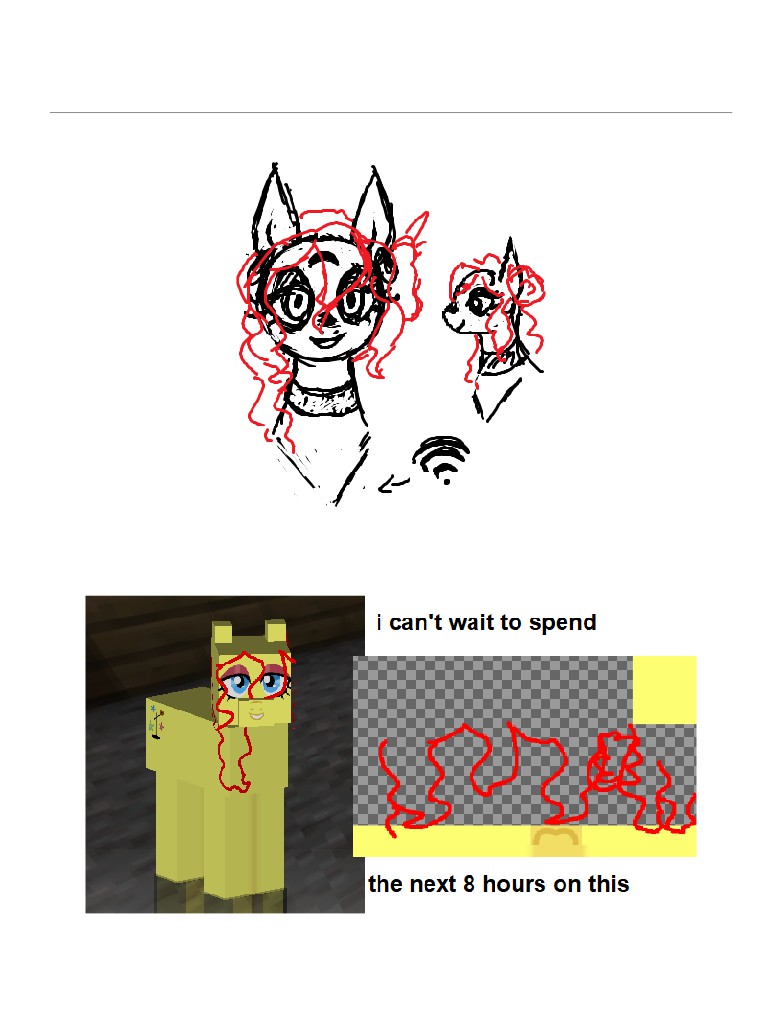
Second only to clothing, hair is easily one of the most complicated parts of the skin.
Its quality is ultimately dictated by your understanding of its shape.
And with that, your options are to either use another mane as a base or jump right in with a sketch.
Continue tweaking the overall shape of the sketch until you achieve your desired results.
Be sure you're giving all sides of the hair proper attention, tighten those lines.
Consider keeping a fat world for testing purposes.
You can use your own player head to check that the lines are fush.
Just for ‘fun,’ a mustache.
Once adjusted and cleaned up, I repeat the lines so the ends still connect after processing.
Moving on, we've got tails.
They didn't make the easiest transition to HD, but there's always a way around.
In reference to the mustache from earlier, you need to understand the texture of your character's
hair (whether straight or curly) and replicate it into an easily repeatable pattern.
Experiment with it for a while if you have to, I'm sure in time you'll fnd a solution.
And there you have it, a pony!
Bits and Bobs
In recent years, I've received requests for a lot of diferent kinds of creatures.
It is no small thanks to the mod’s developers that there are so many diferent shapes we can use.
Thanks.
For the bottoms of the hooves, we can use simple shapes to represent a variety of diferent feet.
For Paws and Claws, I suggest the flled O's. For Hooves, C's and D's are best.
The three O’s, D, and C.
Unshorn Fetlocks, a common (though not exclusive) trait on larger male ponies. If you want, you can
try putting them on the sleeve layer, but I fnd that it often looks a bit bulky. Maybe you want that?
An interpretation of Rainbow Dash with fetlocks.
Horns, the pride of the unicorn race... also known as alicorns. There's not much space to work with,
but there's still a lot you can do with them. On larger ponies, I suggest adding more grooves.
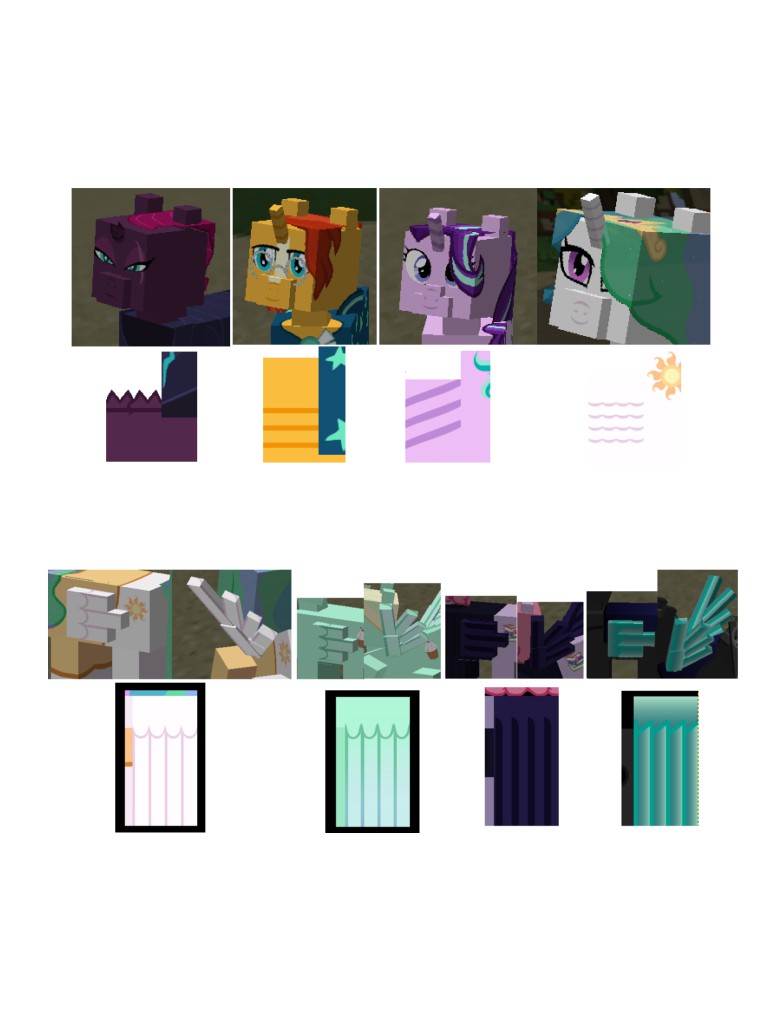
To whom it may concern, Tempest Shadow, Sunburst, Starlight Glimmer, and Princess Celestia.
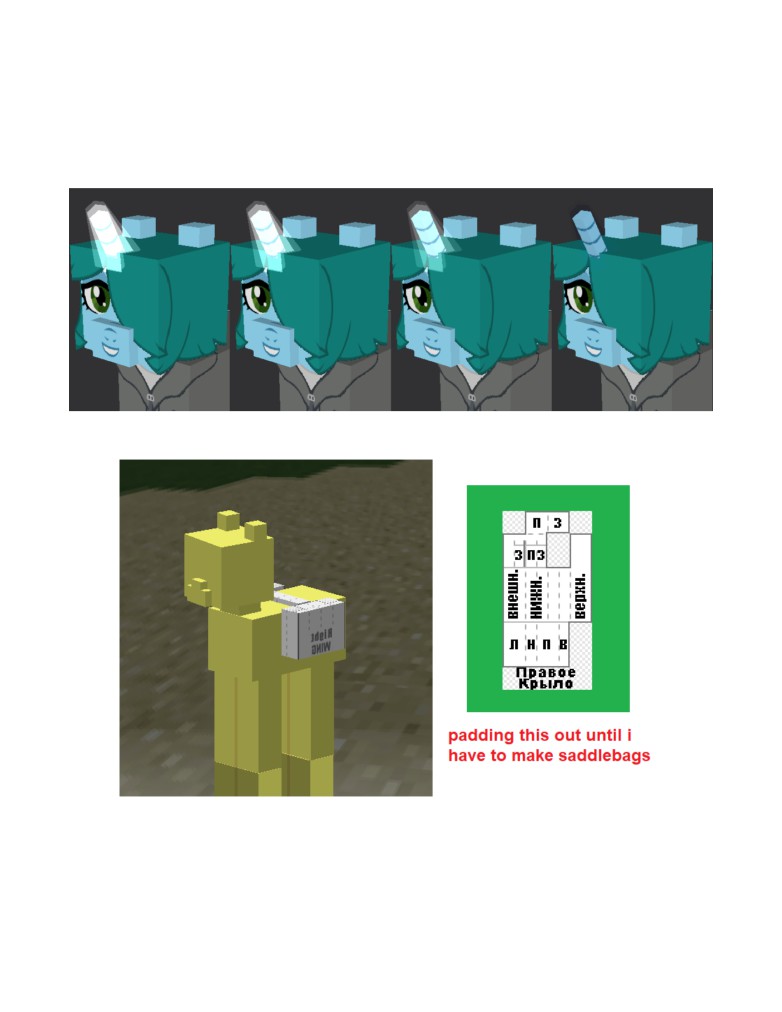
Wings, the joy of the pegasi. Is there a more specifc scientifc name for horse wings?
Before the bat and changeling models were added properly, we improvised.
Guests ponies are Atlantic Sweets and Bon Vivant (batpony). The changeling is courtesy of Idze .
Batpony Wings, a sort of hybrid variant. Useful for alternative races like dragons, too.
These use 'fngers' and 'webbing' instead of 'left' and 'right' like the other wings do.
Long Ears, another interesting addition.
You can use the space normally reserved for the unicorn horn to create three diferent styles of ear.
(For the default ear length, erase the horn entirely.)
Claws, unlike unshorn fetlocks, ft easily onto the sleeve layer. They're a lot of fun.
Don’t forget that thumbs go on the insides of the arms.
Ember, a dragon made using the Alex model.
Tail Stubs are best used to cheat a continuation of patterns such as belly scales/back spines.
It’s not perfect, but it’ll do in a pinch.
Beaks aren't something I encounter often. The main diference between grifon and hippogrif
beaks is where they’re defned. Grifons have far more pronounced beaks
Patrons, “Glyra” and Silverstream.
A grifon’s silhouette is a bit diferent from a pony; their chest is broader and abdomen thinner.
If you want to try a more grifon-like grifon, try flling out the shirt layer to create a larger chest.
Another observation, a grifon’s wings and tail are darker than its fur.
It’s really just the tip of the tail that should be dark, but we’ve usually got to make compromises.
I personally suggest the 1/4th tail length.
Of course, they’ve got their talons and paws as well.
While the paws themselves can be a bit advanced (the pads are a bit difcult to align),
talons are just a more rigid version of dragons’ claws (with the addition of the feathered sleeve.)
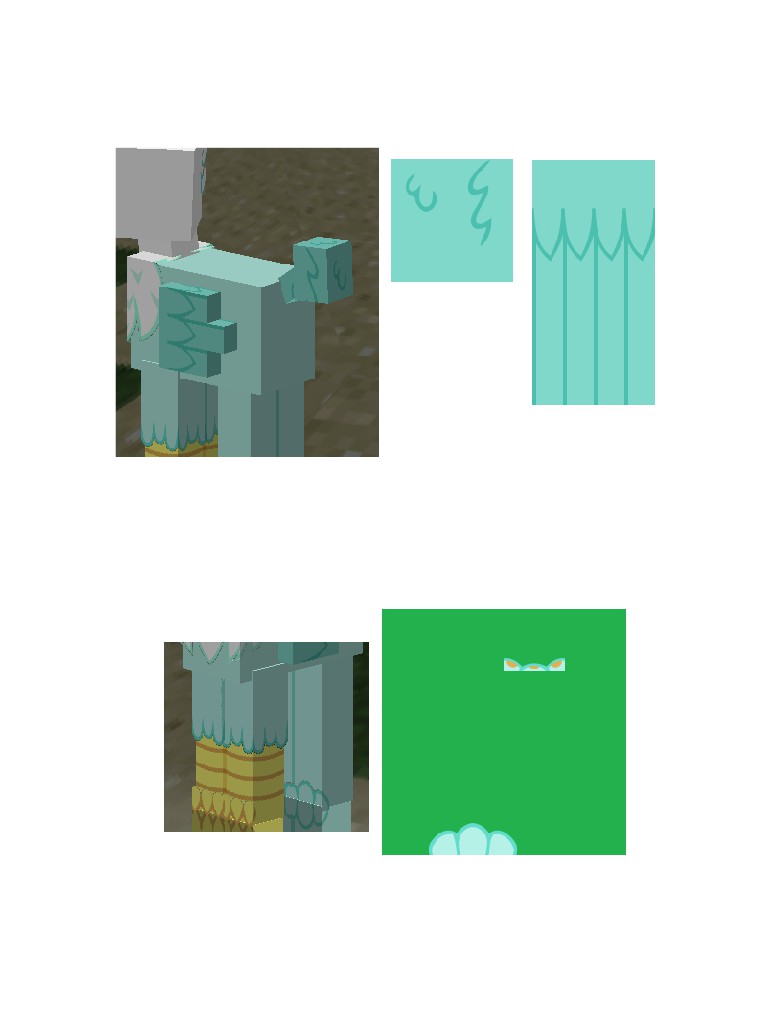
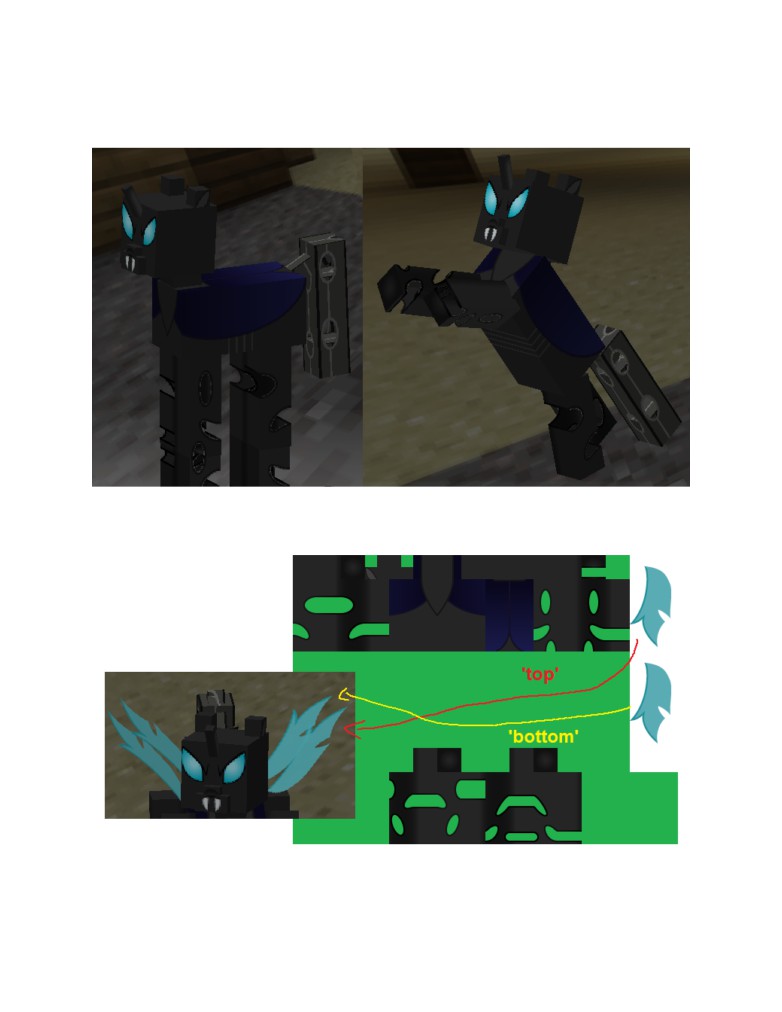
Rotten Carapace, the withered dark body of the starved changelings. Courtesy of Idze .
The leg holes may seem daunting, but they're mostly cleverly placed strips.
For the sake of visibility, the wing background is white. They're practically invisible on green.
Old changelings usually only need the ‘top’ wing. The ‘bottom’ is an (anatomical) elytra.
Lovely Carapace, lovely, lovely carapace. Courtesy of Idze .
Besides the odd, rudder-like membrane tail, there's not much to point out.
Are the gems on their chests growths or jewelry?
By the way, the reformed changelings have elytras. Sseems they always have wings but not horns.
Stripes, the mark of the Zebra.
Nobody knows why stripes, here’s how stripes. Original skin by Idze (I slapped the mohawk on.)
Note that the mohawk is made using the wing space.
Some stripes are just bands, but many of them taper of and shoot from the back to the sides.
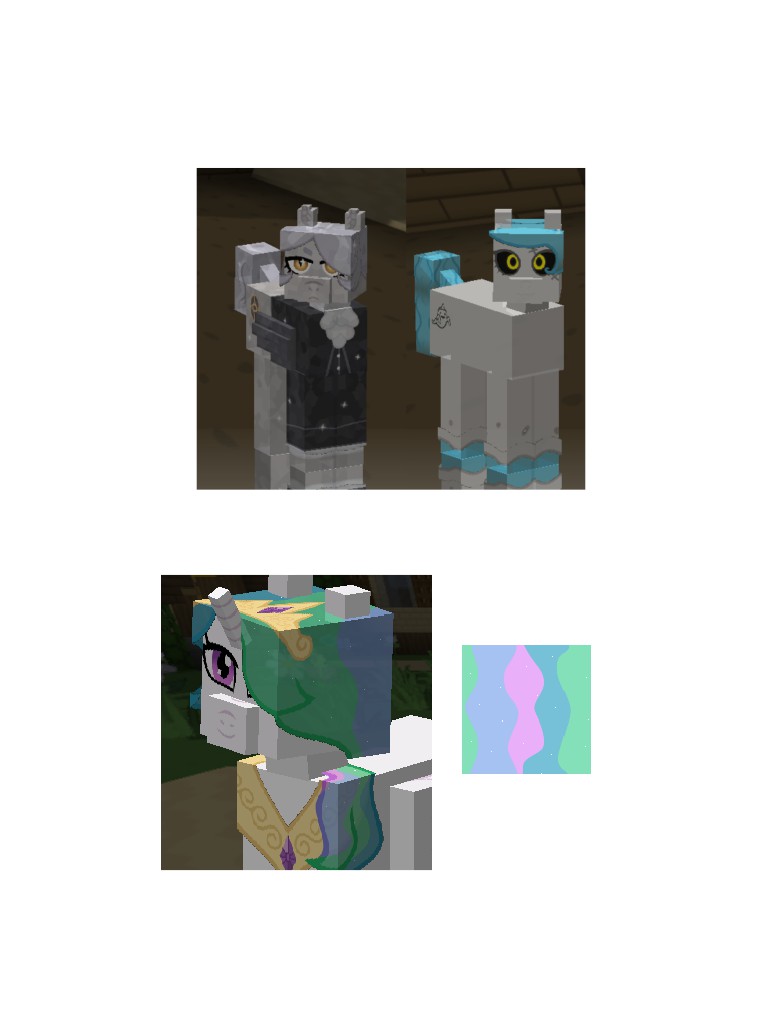
Crystal Bodied Crystal ponies have striped hair with pale gradients in them.
Their eyes have geometric shines, and they're covered in a gem pattern .
Moreover, they're ever so slightly transparent.
(Misty Night on the right (a ghost, but a more obvious sample of transparency nonetheless))
Besides the large star sparkles used on Crystal Ponies, we also have Glitter.
One of the secrets of ethereal manes. (The other being about 65% transparency.)
Enter pixel fickering. By placing pixels at random across portions of a skin, even idle movements
will cause them to appear and disappear, twinkling like tiny stars.
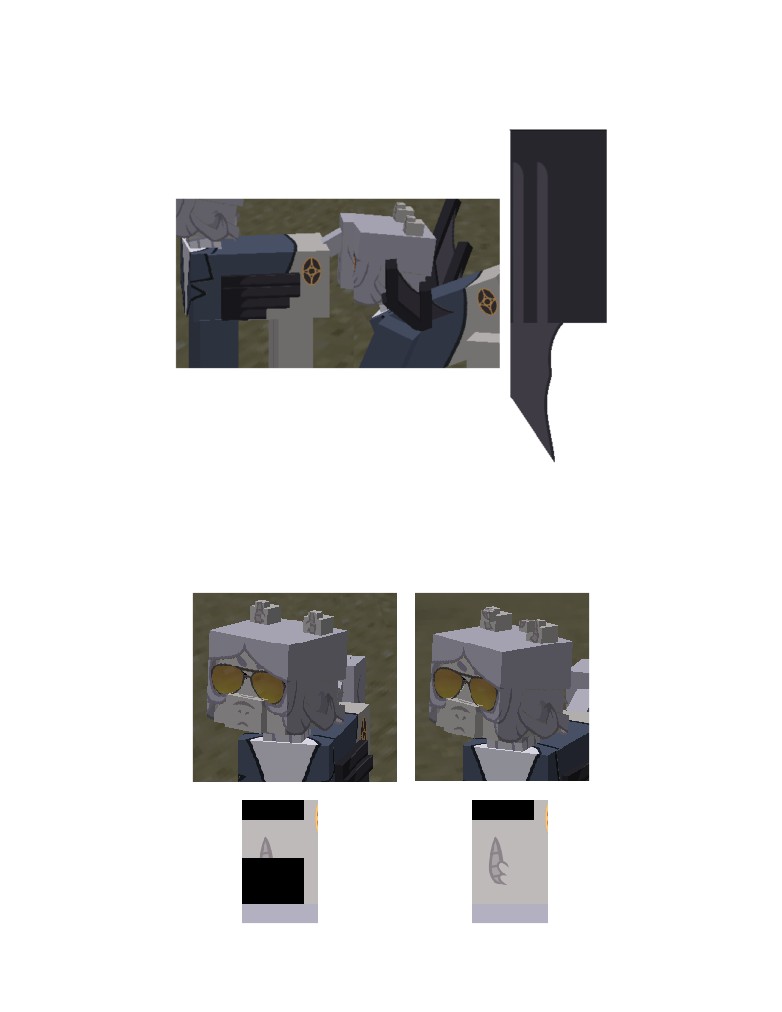
I’ve barely touched on them in the past, but hippogrifs are very fufy.
I generally only add their leg and chest fuf, but you may want to try fufng up the ears.
(Note that their ‘horns’ can be made by erasing the ear and adding feathery tufts to the outer texture.)
Fins (DEFUNCT); where desperate times called for desperate measures.
Before the sea pony body model was added, I was asked to improvise.
By nature, this was an extremely peculiar skin.
Using the legs as a tail and the pants as fns, I was able to cheat the appearance of a fsh tail.
It doesn’t hold up well in motion or at an angle, but it was nonetheless an interesting idea.
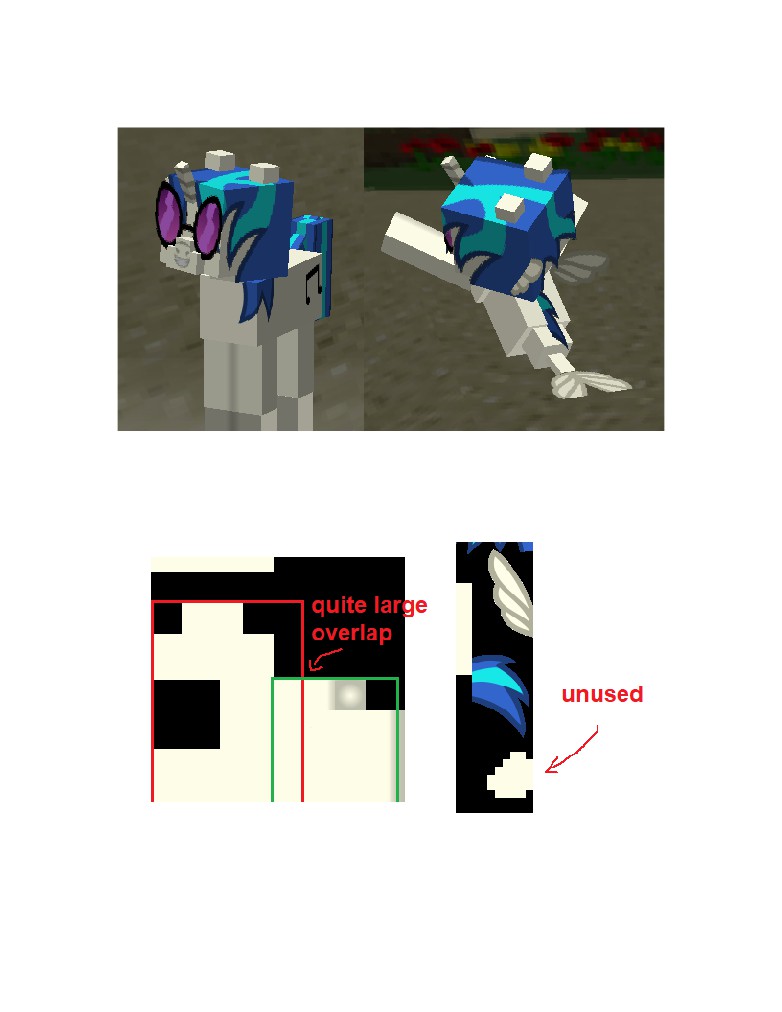
Fins, but for the modern pony. The original skin is by Idze , but I made the fns.
Like regular tails, you need to replicate the texture of your pony's hair in the shape of a fn.
Spiky hair? Spiky fn. Curly hair? Curly fn, etc, etc.
The pants layer is used for the lower half of the seapony and is invisible in their regular form.
Now, due to the Sea Pony body being somewhat incomplete and/or untested,
(there’s an unused space for presumably the tail fn and an overlapping pony leg/seapony torso)
there’s a bit of a hitch. They’re ‘alicorn’ sea ponies in water, but unicorns on land.
There may be other caveats, but it’s not something I can really stress out about.
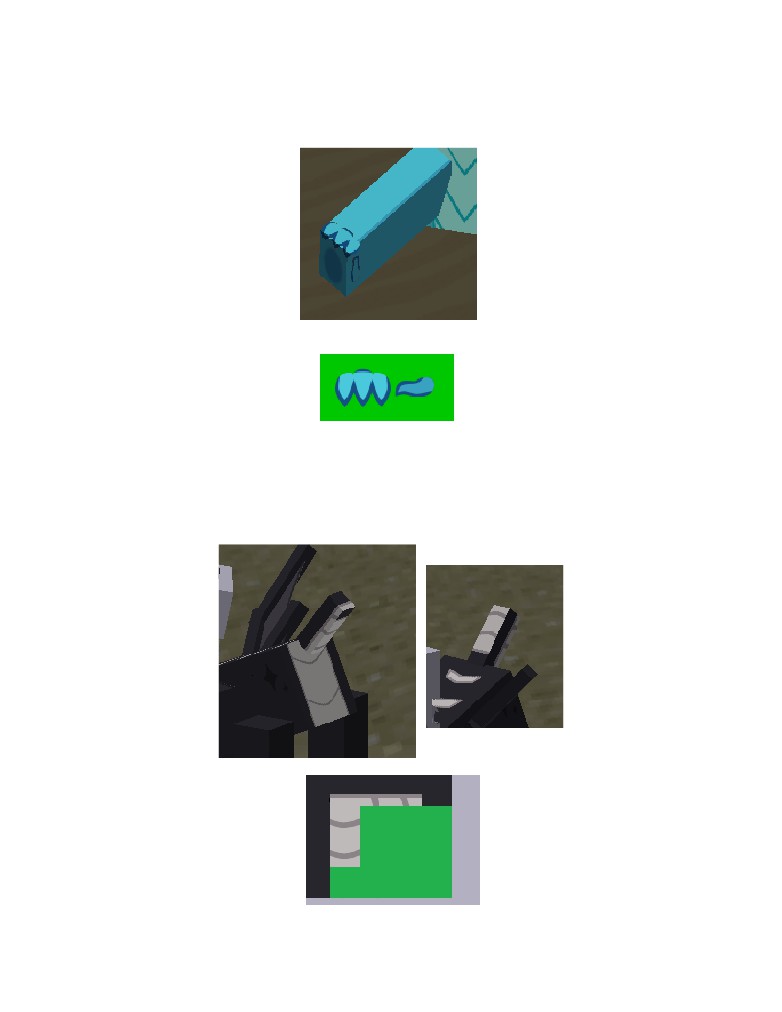
Kirin…
Kirin Autumn Blaze & Nirik Autumn Blaze
Aside from fuf and scales, Kirin are: cloven hooved, prong horned, scaled, and big eared.
I handled the back scales in a manner similar to clothing (elaboration in next section.)
Nirik are structurally identical to Kirin (and each other,) so I don’t have much to say on them.
Don’t try blurring Nirik fre unless it’s on the most basic arm/leg layer.
Transparent fre should be fne on the pants/sleeves layer though, so go ham.
If anything needs to be clarified or otherwise corrected, please contact me at Gray_Mane#7547
Measure Twice, Cut Once
In the show, clothing seemed reserved for special occasions. Besides the Mane 6, guests at the Gala
wore simple outfts. Stallions wore collars, and mares wore a sash or saddle.
Various outfts have shown up through the years as one-ofs on or around Rarity.
They were still generally in the vein of actual horse clothing, though; saddles, belts, blankets,
collars, and other assorted barding (no matter how fowery or bedazzled.)
As seasons passed, the shape of clothing became more complex, more human. Sleeved.
By the time the second Gala rolled around, full suits and dresses were noticeably more common.
The point is, ponies don't usually wear clothes the way I'm used to making them for players.
We're people and we sought something with greater individuality. Just an observation, really.
As is the case with everything else, you should probably have a solid reference of what you're going
to do. For clothing, it may help to have a human reference for the sake of visualization.
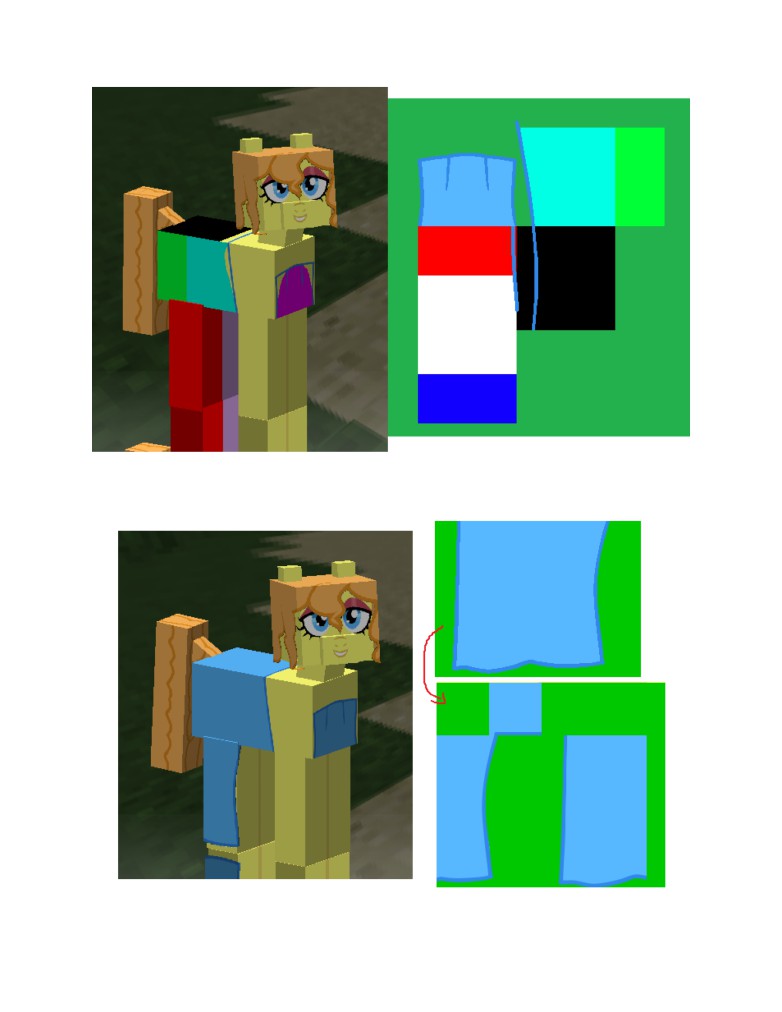
It's a little more complicated this time around, but we still start with blocking in/sketching.
Since we're making a dress, we're covering the hind legs and a better part of the torso this time.
Here’s the thing, though. Knowing is half the battle.
For the sake of clarity, I've colored various areas in diferent colors for visibility.
This is the bulk of the dress and the source of its complications; the actual layout.
When rearranged like this, it's similar to a dress pattern.
Lines done like this usually come out fush.
Everything's done, you just need to cut and sew.
After reassembly and then fnagling of a skirt, we’re almost done with the dress.
(It probably won’t be visible after I give her a boa, but I wanted to add a little ribbon.)
After much trial and error, as small accessories tend to be, a pearl choker.
Following up on the promise of the boa; this isn't an exact science.
It’s a bit plain, but I think it demonstrates what it needs to be. (I should have made it pink...)
I don't know how to feel about horse shoes. Do they go on the front legs? Or the back legs? Both?
Anyway, you can pretty much just build of of this basic shape to get whatever shoes you want.
If you’re like me, you eventually just get sick of looking up images of the show for reference.
I suggest putting shoes on the legs to avoid confict with whatever’s on the pants layer.
Don’t forget the soles of your shoes, by the way.
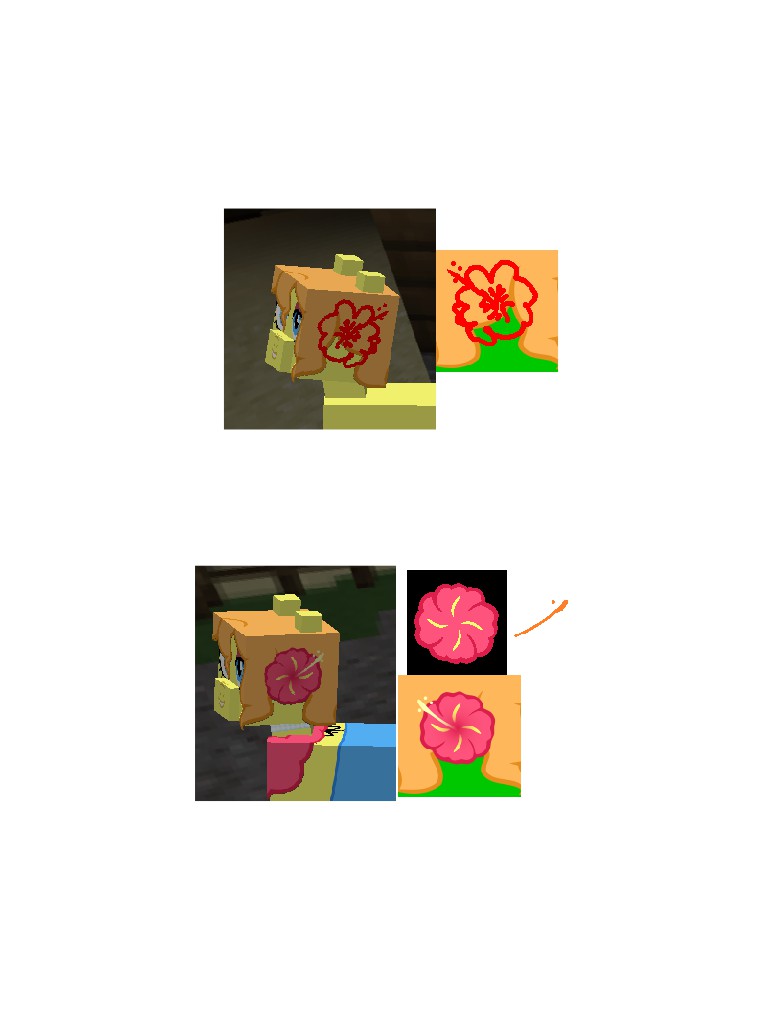
Hats, hair accessories, etc are more or less pasted images.
I haven't fgured out if there's a way to get hats to look any better, honestly.
Hi, biscus.
I think I drew the fower a while back and mistook it for hair, or maybe vice versa.
Well, it’s a fower now.
Draw the rest of the fower.
A couple of tweaks later, and we have our hair accessory.
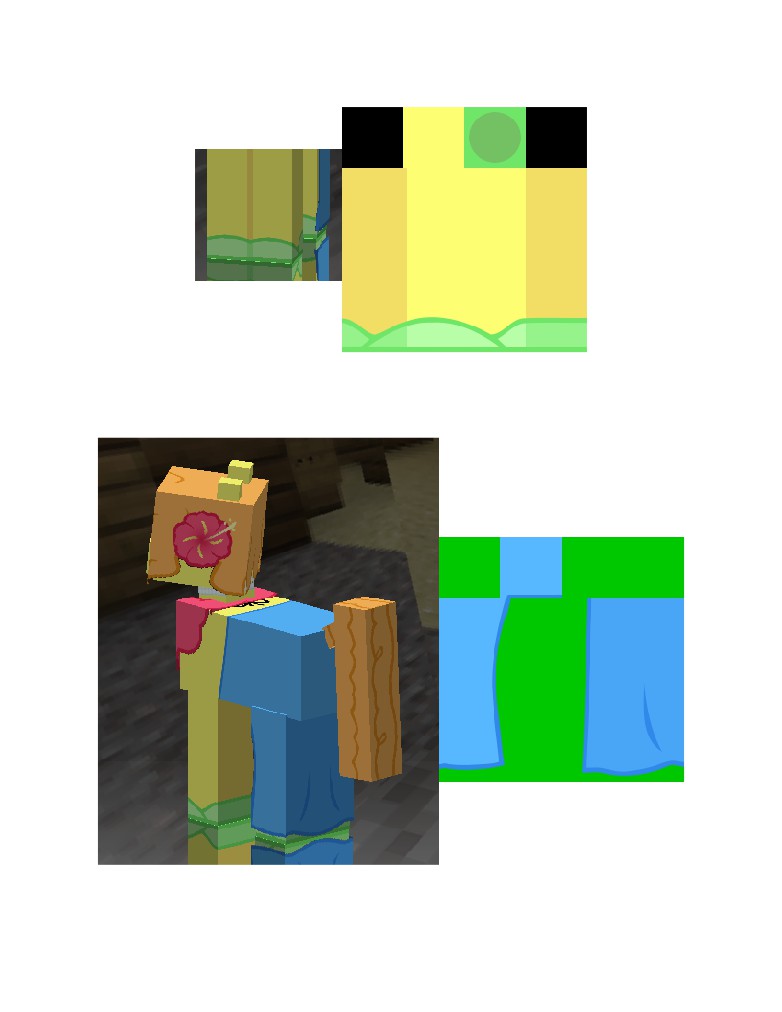
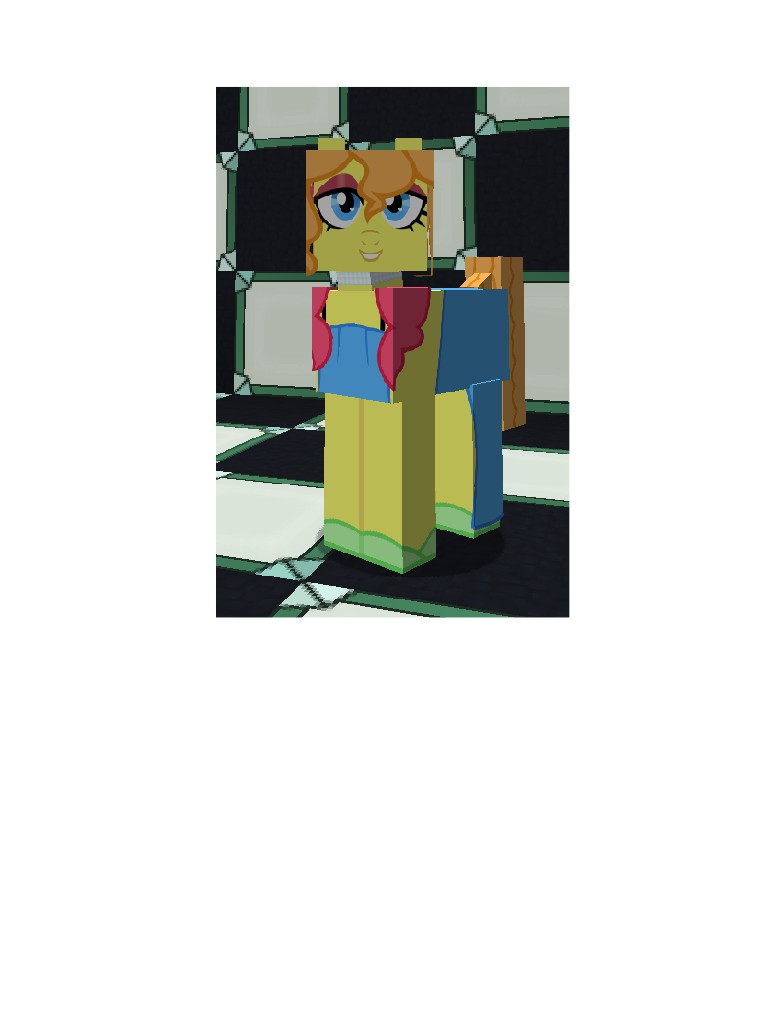
We’re in the fnal stretch, but she’s not ready just yet.
Don’t forget the rest of your shading.
Well, if you can call it shading.
Pull your outline color to a new layer, line it up with the leg shadows, and set it to 46%-ish opacity.
Some colors may need to be a little lighter or darker, though.
Players have asked me for a guide for years, but making skins and guides are diferent skills...
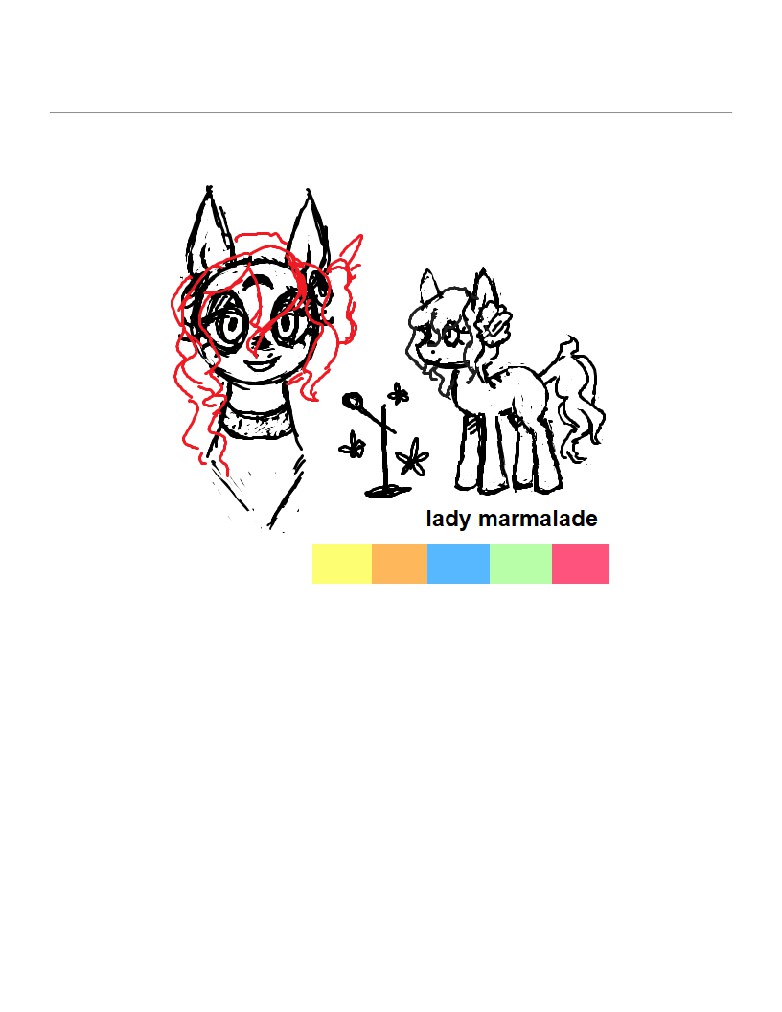
In July 2019, things were set in motion and Lady Marmalade was born.
I often worried if I'd earned a reputation for seeming aloof, so I made sure she seemed cheerful.
Most of the inspiration for her came from Josephine Baker. (I had no idea about Cleopatra Jazz.)
She was originally named Coco Labelle after Patti Labelle, but besides that this is too alliterative to
Coco Pommel, Coco Pommel herself is referred to as Miss Pommel due to copyright issues.
Credits & About
and many, many, many more.
About the Author
Once again, I am called Gray Mane.
I want to create uncynical things with beauty and dignity.
Why did I make this guide?
Because people asked for it and I allow myself to get roped
into things a little too easily sometimes.
I think a large portion of HD guides have also been wiped
of the face of the earth, so there’s that, too. Lots of forums
and pony servers are gone.
try making your own skins.
Although I realize some consider me to be the best (usually
when they want something from me), Idze will forever be
the MineLP artist I hold highest.


